So I made another one of these for K. and L. and decided to kinda give a better tutorial than the one over on my flickr account. So here ya go:
They are super easy and require only minor sewing/embroidery skills
Materials:
~Sewing machine (optional - you can hand sew it together)
~One old pair of toddler overalls (these usually go up to about 12-18mons)with the snaps in the legs
~Embroidery floss - contrasting or matching color
~Embroidery needle
~Scissors
~buttons
~and any other sewing supplies you use (i.e. thimble, or the little doo hickey that helps you thread you needle, i LOVE that little guy)
Directions:
Taking your overalls
cut off the bottom part of the leg. Cutting closer to the next snap up so you have room to fold over and hem it. Or if you want a raw edge cut it so that it'll be about 1" - 1 1/2" wide.
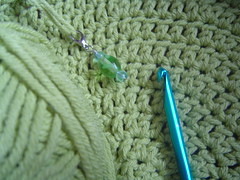
Next, measure on your wrist wear you like for the cufflet to sit.
(in this pic it is snapped together and folded in half. The pin is wear it measures on L.'s wrist. Cut about 1/4-1/2" to the right of the pin.)
Next, placing one piece overlapping the other piece (this depends on how much seam allowance you left in the previous step), take it to your sewing machine and stitch it together or hand sew it together using either a back stitch or a whip stitch. I just used a straight stitch with white thread but you can do a zig zag stitch in a contrasting color or a decorative stitch.
Then, hemming it by hand fold over the raw edge about 1/2" and stitch it into place.
Now you can embroider around the edge. I used a blanket stitch and then went back and placed french knots in between the blanket stitches. I used these directions over on Needle 'n Thread for her embroidery lessons. You can use any decorative embroidery stitch that you want.
Embellish it however you want by sewing on a button (or two) and your all done!
Here is the finished one on K.'s wrist. She absolutely LOVES it.
Wednesday, June 6, 2007
feminine cufflet ~ tutorial
![]()
Subscribe to:
Post Comments (Atom)
No comments:
Post a Comment