

I have (like any another knitter) TONS of needles and they are now officially at the point where they got out of hand and needed a home. James got me some 16" circular needles for my birthday and that's what sorda put this project in gear. It fits ALL (well, almost all) my needles and I'm in love with it. Plus, it's super easy to make and you can crank one out in an afternoon.
*Note: This is just a basic pattern to follow. I searched (and searched and searched) for exactly what I was looking for and took bits and pieces from a few that I've found. I'm not going to put one of those "copyright" things on this because 1. I'm not the one who designed the knitting needle case (in general, this one I designed) and 2. well, I just wanted to do this tutorial to help others. I've tried to make the instructions as clear as possible so that even the most beginner of beginner stitchers could make this. If you have any questions, or if something is unclear, please contact me multicrafty(at)gmail(dot)com. Now, onto the case!
*~Materials~*

(The following are going to be "group" fabrics to make easier explanation in the directions)
*~Group A~*
1 piece out of your outer fabric measuring 17" by 1.5"
1 piece out of your inner fabric measuring 17" by 5.5"
*~Group B~*
1 piece out of your outer fabric measuring 17" by 1.5"
1 piece out of your inner fabric measuring 17" by 9"
*~Group C~*
1 piece out of your outer fabric measuring 17" by 1.5"
1 piece out of your inner fabric measuring 17" by 12"
*~Ribbon (I had a 42" piece of ribbon and it was enough for the project, in fact it was a little more than what I needed)
*~Embellishments (you could do applique, buttons, flowers, whatever you want on the front)
*~Tailors chalk, fabric pen, or something else that you use to mark fabric
*Directions*
(I used a 1/2" seam allowance for the whole project. Top stitching after it was all done was about 1/8")
Taking your Group A fabric, pin the 17"x1.5" to the 17"x5.5" piece with right sides together and stitch. Repeat for Group B and Group C. (*Note: If you don't want to do this you could use bias tape)


Take it back to your sewing machine and "stitch in the ditch". Trying to get as close to the outer fabric as possible. I use my needle as a guide and lower it down just so it's almost touching the fabric and adjust the fabric from there to get it right where I need it. (You will also repeat this step for Group B fabric as well as Group C.


Take Group C fabric and Group B fabric and pin the to the inner fabric that measures 17"x20" making sure to line everything up at the bottom. I used LOTS of pins for this part because I didn't want this guy to move. I even added more pins after this picture was taken.

Starting and the bottom, measure 2" in from the right and make a mark using your tailors chalk (or whatever else you use to mark fabric) and then from that mark measure 1.5". All pockets are 1.5" apart, the final pocket on the left will be just shy of 2" (or just over 2" I can't remember but it all works out in the end). Make marks at the 1.5" as you go along.


Once you have all your marks made, take to your sewing machine and from one of the middle marks, stitch all the way up, back tacking at each pocket for extra stability and stopping at the top pocket. You want to start in the middle and work your way out that way nothing comes undone or shifts on you.


Repeat for all the marks making sure to back tack at each pocket.
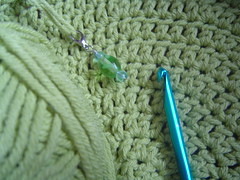
Preparing Group A fabric and if you'd like to have a place for your stitch markers, take a piece of ribbon measure about 6"-7". I didn't cut mine until the very end because I was afraid that I would stitch the ends to it by accident.
Stitch where you have your pins and back tack or go over it a few times for extra security. After that take the fabric and pin it to the inner fabric with the other pockets.

From here, I didn't measure my pockets exactly, I just made these pockets the width of 2 pockets from the previous pockets (does that make sense?). Once again you want to start in the middle to make sure everything stays secure and doesn't shift on you and this time instead of starting at the bottom, you want to actually start at the top of Group A and line it up with your previous stitch marks. Just as shown in the picture below.


After that, just load it up with your knitting stuff and your good to go.


If you have any questions, or if any of the steps were unclear, please let me know. Thanks so much! Also, if you make this project, I'd love to see how yours turned out, just email me at multicrafty(at)gmail(dot)com or post in the comment section.
Edited to add: All pictures are clickable so if you need a better view of how I did something, just click on the picture.
35 comments:
Thank you so much Angie for sharing this wonderful tutorial. It's really helpful!!!!
love ur tutorial, can't wait to try.
also, can i link your blog to my blog?
thanks
waiyi
...dotty... says
Very good and THOROUGH tutorial ! Great job !
Thank you very much dotty! I tried to make the tutorial so that even a beginner sewer could make it. I hope I was able to do that.
That is fantastic! Very nice...I was just grumbling about how I wanted a multi-layered pocket needle holder to stuff the extras in and there it is. Nice job.
I found your tutorial via Sew Mama Sew, and just want to say thanks! I love your design and I plan to make one or two as Christmas gifts!
Thank you both so much katiekate and heather. If you have any questions, just please let me know.
I saw this on the sewmamasew blog. I have a question about the yellow floral fabric. I found a bolt of this on the Walmart $1 table and bought the rest of it. I've used up every inch because it is such a fabulous texture. Do you know if there is any way to find this fabric online anywhere. I got mine over 2 years ago.
Thanks so much! This is perfect for my Secret Santa because my friend is a knitter. Your directions are so thorough. Happy Holidays!
Lori ~ I'm not sure where you would be able to purchase the fabric online. I bought it over the summer and I haven't seen it since. I would love to know as well because I'm down to my last little scraps. I'll keep an eye out for it (or something similar) and let you know.
~Anonymous~ I'm glad that you will be able to use my tutorial. Let me know if you have any questions.
Thank you so much for the detailed tutorial. I already knew in my mind what I wanted to do for my sister-in-law, but I have been sick and I just couldn't bring myself to start making the needle case without some sort of guidelines. My brain is pretty much on overload this holiday already and it is only December 1st!
BTW - all the things you have made are great. I have been surfing your Flicker photos. :)
Thank you so much snyder.crafting! You are too kind. I hope you feel better and I know what you mean about overload. I have things for my girls that I want to make, plus I'm knitting my Mom a purse, and stuff I want to make for myself all before Christmas.
im a quilter/sewer kinda crafter, and my sister's a knitter. thanks for the tutorial, its the perfect last minute addition to my christmas gift for her! (not to mention a great way to utilize my fabric stash!)
Thank you magpiecrafts for stopping by. I'm glad that you'll be able to use it as well as your fabric stash. I'd love to see how it turns out!
I just finished one of these for a Christmas present, and I love, love, love it. It came out perfect! The only thing I changed was to layer the outer fabric with a thin batting and then machine quilt freehand following the design of the flowers in my fabric. It made the roll a little thicker, but not too much imho.
Thanks for the great pattern and detailed instructions!
Oooo! That is a nice idea. I thought about doing that as well.
Glad that my tutorial was helpful to you.
just posted pictures on my flickr! Thanks again!
http://www.flickr.com/photos/sewchicgirl/
Very nice, thank you so much for sharing this :-)
Thank you bathooon!
Thank you for posting this tutorial. I have been wanting to make one for a while now. I took some pictures and posted them on my blog. Thank you again!
This is so beautiful!! I just finished making mine and I love it! :)Thank-you
Thanks for this tutorial! It helped me a lot in designing my own needle case. I just finished my second one (for a friend in need!) and have cut pieces to make more for all the knitters in my life!
Thanks for this tutorial! It helped me a lot in designing my own needle case. I just finished my second one (for a friend in need!) and have cut pieces to make more for all the knitters in my life!
I just used this tutorial to make a needle case of my own. I modified it slightly, but the basics were all yours. It was great and so straightforward. Thanks so much.
If you'd like to see photos, I've posted them on my blog, you can see them here:
http://knittingprettyindc.wordpress.com/2008/08/05/busy-bee/
Thanks again!
Thank you for such a wonderful tutorial!! I'm not a knitter, but I just made one for my dear friend, and have plans on making a few more! You can see pictures on my blog here:
http://myenchanteddandelions.blogspot.com/2008/10/and-now-for-something-completely.html
I just finished one of these. I made it with upholstery fabric I had left over- it gorgeous and now durable! Thanks so much for the pattern. I'll be making these for all my knitting friends!
Thank you for this great tutorial. I was sitting down yesterday planning out how I wanted to make one for my mom and was a bit stymied as to how wide to cut it and how wide to make the pockets. In desperation I googled for a tutorial and up popped yours, I'm so glad it did!
The only thing I changed was adding a layer of thin cotton batting to the outer fabric and quilting them together. It made the roll slightly thicker.
I am so thrilled with how it turned out and now am not stressing about the one I need to make for my sister. I might even make myself one after Christmas!
I just posted pics on my blog of one I made from your tutorial last year for a friend's daughter! I LOVED your instructions and pictures!
If you have time, the link to this post is:
http://www.homeschoolblogger.com/neveradullmoment/630895/
Thanks for a great idea!
Trisch
HI! It is three days before Christmas and I am madly trying to find inspiration to make something for my sister who knits and challenged the family to make home made gifts this year. I am glad I found your tutorial, I plan to stitch one of these needle cases up tonight. Thank you sew much!
Anna
Twas the night before Christmas and all through the house not a creature was stirring not even... hey wait a minute - Mama's up all night again making a knitting needle case. Wish me luck - Excellent job combining all other ideas into an ideal one! As soon as the holidays die down I'll make one for myself.
Thanks for cleaning up my knitting bag, it was a mess!! I posted pictures here... http://crunchywannabe.blogspot.com/2009/01/something-for-me.html
Hi! Thanks for the tutorial, I whipped one up yesterday afternoon and it turned out great. Here it is:
http://www.ravelry.com/projects/Sublimiknit/needle-case
My mom also made one, you can find hers under her ravelry profile 'bubblebutt'.
Cheers!
Hello.
This design is beautiful! I'm inspired to create my first needle holder. But, this will be my first sewing project. I'm okay going slow, but I'm very visual and wonder if there is a way to get bigger and maybe even more pictures? i could send you my email perhaps? Thanks!
Thanks *SO* much for this tutorial! I love your version - it was the best pattern I have found. Here is the one I made with a minor suggestion to make your directions more clear. Feel free to use my pathetic attempt at a layout image:
http://lynanne.blogspot.com/2009/02/knitting-needle-case-organizer.html
Post a Comment